Mandoline Guide: How to Use It Safely and What Makes It Worthwhile
A mandoline slicer can turn vegetables into paper-thin slices in seconds. Honestly, it’s probably sent more home cooks to A&E than just about any other gadget out there.
If you want to use a mandoline safely, pick one with a solid hand guard, set it up properly, and—most importantly—know when to stop before your fingers get anywhere near that blade. Some folks won’t even touch a mandoline because, well, they’re scary. Others? They’ll tell you it’s a must-have for everything from potato gratins to homemade crisps.
Is a mandoline dangerous? Sure, but the real question is whether it’s worth the risk and the space in your kitchen. A good one runs anywhere from £20 to £100, hogs a bit of drawer space, and you have to be careful cleaning it.
But the results? Uniform slices that cook evenly and look like something out of a restaurant. Even the sharpest chef’s knife can’t always pull that off.
This guide digs into which mandoline features actually matter, how to use one without slicing yourself, and whether you should even bother owning one. Some cooks swear by them, using them regularly, while others do just fine with a sharp knife and a little patience.
What Is a Mandoline and Why Use One?
A mandoline slicer lets you cut veggies and fruits into perfectly even slices way faster than you could with a knife. You get the same thickness every time, so food cooks evenly and just looks better.
Definition and Key Features
A mandoline is basically a flat surface with an adjustable blade. You slide food over the blade’s edge and, just like that, you’ve got slices.
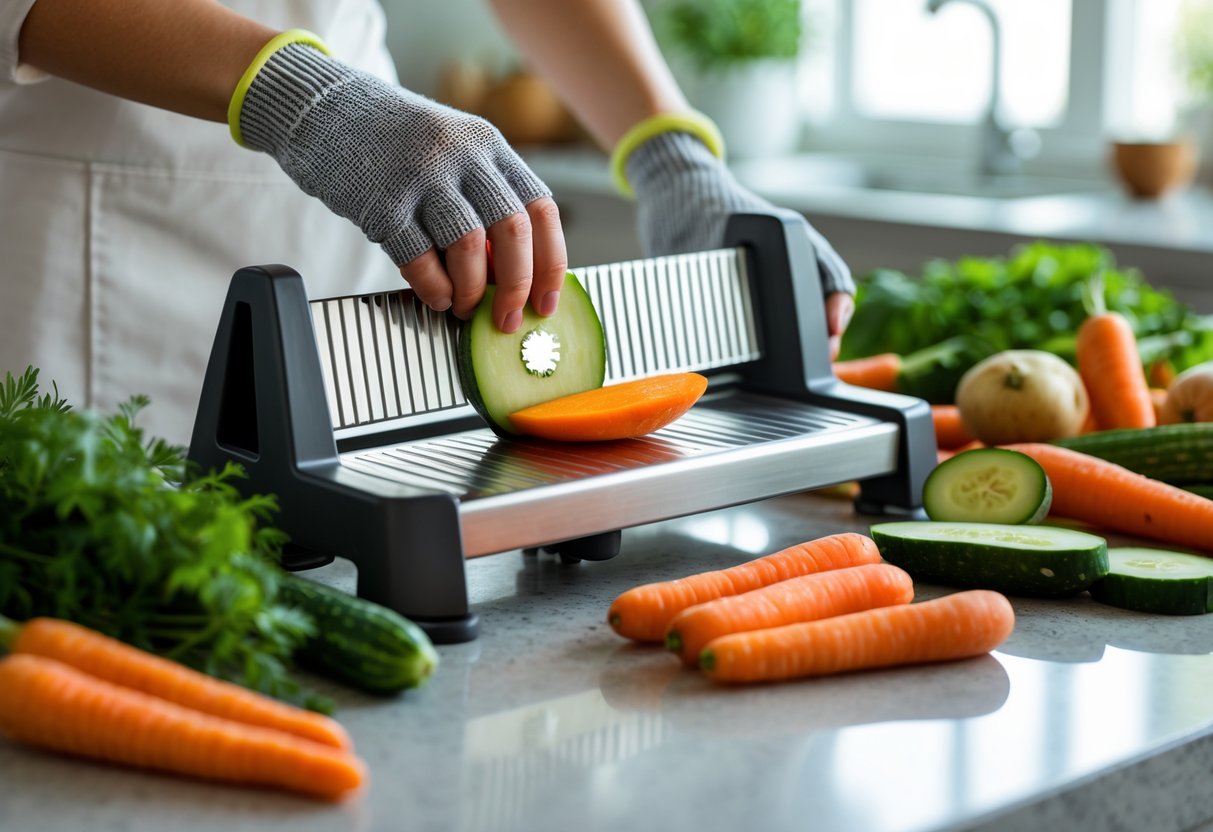
Most models come with a safety guard—usually with metal prongs—to hold the food in place while you slice.
There are two main types. Straight-blade models handle firm veggies like potatoes, carrots, and squash. V-shaped blades work better for softer stuff like tomatoes, mushrooms, and ripe stone fruit.
Standard mandolines let you adjust thickness from paper-thin (about 1mm) up to chunky planks (6-8mm). Some models have extra blades for julienne cuts, matchsticks, or even waffle slices. Usually, you’ll find the thickness dial or slider underneath.
Benefits Over Knife Slicing
Speed is the biggest perk. You can slice a whole courgette in seconds. With a knife, you’ll be there for ages—especially if you’re prepping for a crowd.
Uniformity actually matters, too. If your potato slices are all different sizes, some burn and others stay raw. A mandoline keeps everything the same, which is crucial for things like potato dauphinoise.
And those tricky cuts? Like paper-thin fennel or perfect pepper matchsticks? Doing that by hand is a pain. The mandoline just nails it, every time.
Common Foods Used with a Mandoline
Hard vegetables like potatoes are a dream on the mandoline. They slice up perfectly for crisps, gratins, or rösti.
Carrots and parsnips julienne easily for slaws or garnishes. Cabbage shreds evenly for coleslaw or fermenting.
Soft produce calls for a V-blade. Cucumbers become even rounds for salads or pickles. Tomatoes slice clean for sandwiches or tarts.
Fruits work, too. Apples go into tarts and crumbles in neat slices. Citrus rounds are great for drinks or candying. If you halve peaches or plums first, you can get lovely salad toppings.
Brussels sprouts shave into ribbons for salads. Fennel turns into see-through slices that soak up dressing. Onions slice thin for caramelising or pickling.
Types of Mandoline Slicers
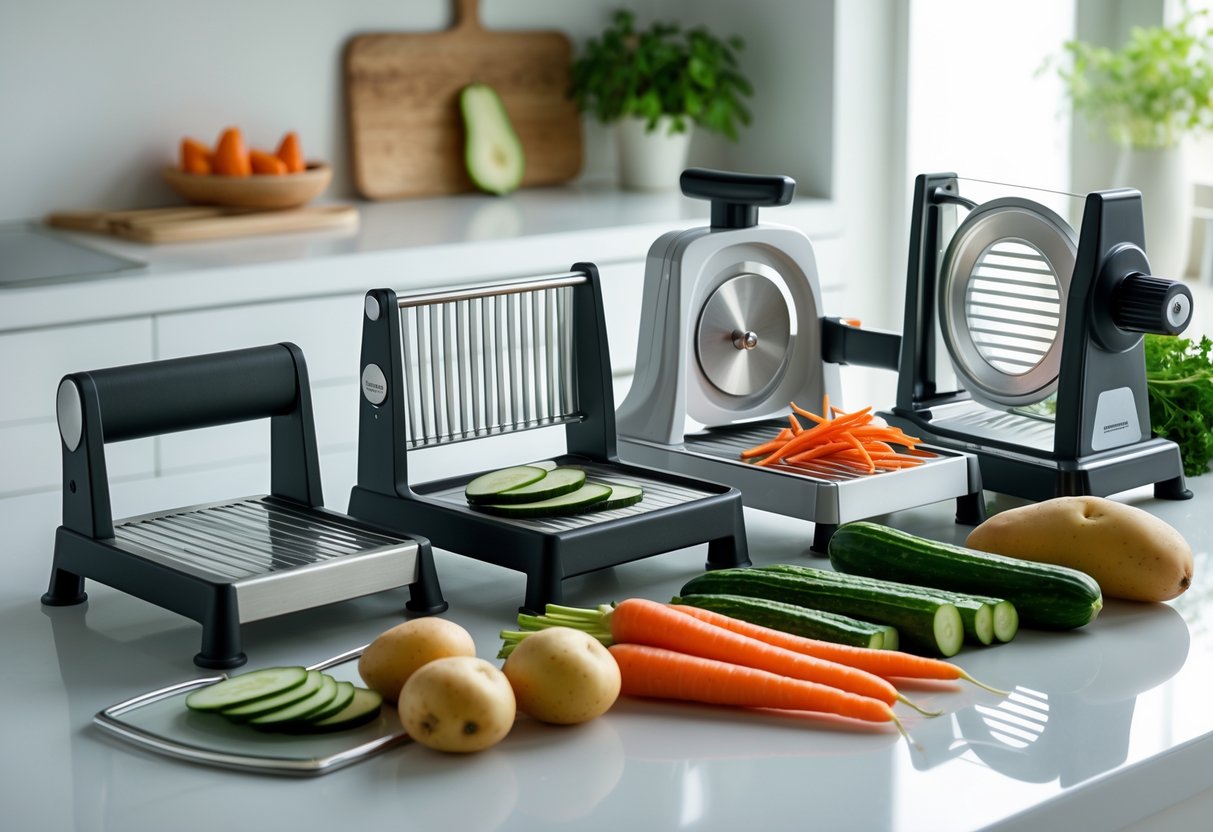
Mandoline slicers come in three main types, depending on the blade and what you want to do. Straight-blade models are best for firm veggies, V-blade slicers are gentler on delicate produce, and then you’ve got julienne attachments for matchsticks and fancier cuts.
Straight-Blade Mandolines
These have a single flat blade set at an angle. They’re the kings of consistent, even slices.
You’ll want these for potatoes, carrots, and beetroot. The blade cuts through dense veggies without crushing them. Most straight-blade slicers let you pick your thickness, from paper-thin up to about 8mm.
The flat blade gives less resistance, so you can slice smoothly without hiccups. That’s why people use them for gratins, crisps, and anything needing uniform slices.
Pros in restaurant kitchens love straight-blade mandolines for their accuracy. The downside? Soft stuff like tomatoes or peaches can get a bit squashed.
V-Blade and Adjustable Mandolines
V-blade mandolines have two angled blades that meet at a V. Instead of pushing straight down, you slice with a motion that’s a bit more forgiving.
These shine with delicate foods. Tomatoes, mushrooms, and soft cheeses slice neatly without turning to mush. You don’t have to press as hard, either.
Most V-blade models let you adjust thickness with a dial or lever. You get a range from see-through shavings up to about 6mm.
They handle both soft and firm things pretty well, but straight blades are still better for really dense veggies. If you don’t have room for lots of gadgets, a V-blade is a solid all-rounder.
Julienne and Specialty Blades
The julienne blade is for turning veggies into matchsticks. You’ll usually get two sizes: fine (2mm) for garnishes and standard (4mm) for salads.
Most mandolines let you snap in the julienne blade over or under the main one. Set your thickness, run the veggie across, and you get matchsticks in one go.
Some mandolines offer waffle or crinkle-cut blades, too. For those, you rotate the vegetable between slices to get that classic crosshatch look.
The catch? Julienne attachments don’t always play nice with oddly shaped veggies. Carrots, courgettes, and cucumbers work best—just keep them straight and trim as needed.
Choosing the Right Mandoline for Your Kitchen
Pick your mandoline based on what you slice most often and how much space you’ve got. If you want to handle both soft tomatoes and firm potatoes, go for a V-blade design. Straight blades are better if you’re prepping lots of dense veggies.
Essential Selection Criteria
Blade design matters more than price, honestly. A V-blade, with its two edges meeting in a V, pierces soft-skinned foods like aubergines and courgettes before slicing, so you don’t end up squashing everything. Straight blades are best for potatoes and beetroot, but they struggle with soft stuff.
Consider the size and where you’ll store it. Full-sized mandolines with legs are stable for big jobs. Compact Japanese-style ones store flat and fit in a drawer. Handheld versions are good for small jobs, like slicing mushrooms, but you lose some control.
The hand guard is your safety net. Look for one with metal prongs that really grab the food and keep your fingers away from the blade. Some guards feel flimsy—if it doesn’t feel safe, skip that model.
Blade Materials and Durability
Stainless steel blades last longest and don’t rust. You’ll find them on cheap and pricey models. The real difference is in how thick the blade is and how tightly it’s attached. A wobbly blade means uneven slices and a bigger risk of hurting yourself.
Carbon steel blades are easier to sharpen but need drying after every wash or you’ll get rust spots. Most Japanese mandolines use high-carbon stainless steel, so they’re sharp and low-maintenance. Some brands sell replacement blades, which is handy if you want to keep your mandoline going for years.
The frame material affects how steady the mandoline feels. Heavy-duty plastic works fine for home cooks. All-metal French mandolines are for pros who slice mountains of potatoes, but they’re pricey and bulky.
Additional Features to Consider
Look for clear thickness markings and a dial or lever that locks in place. If the settings slide around, you’ll get uneven slices. Most people need a range from super thin (0.5mm) to thick (6mm).
Interchangeable blades add options but mean more bits to wash and keep track of. Built-in julienne settings that flip up or down are easier to manage. Waffle-cut attachments are fun, but not essential unless you really love fancy chips.
Non-slip feet or a textured base keep the mandoline from sliding around. Some models have a container that catches the slices underneath, which is great if you’re short on counter space.
Essential Safety Equipment and Precautions
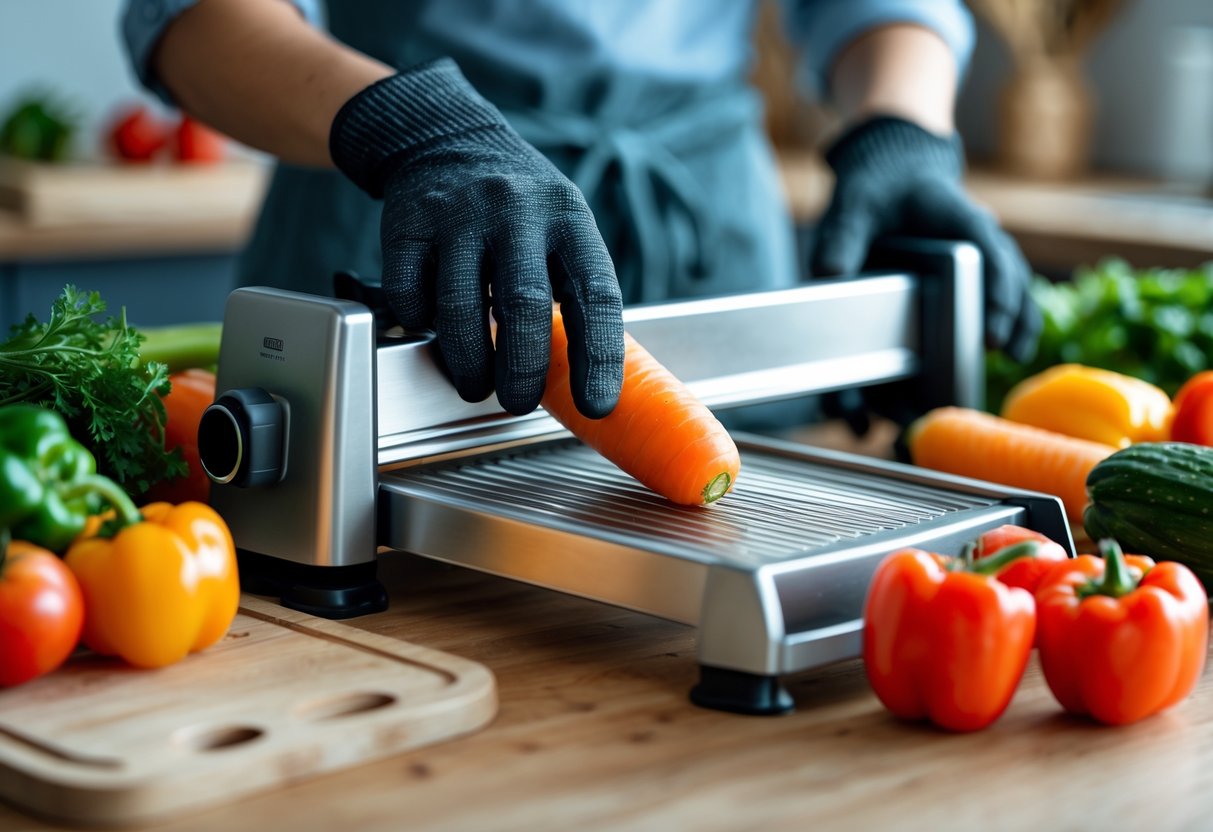
The blade on a mandoline is seriously sharp, but with the right gear and setup, you can avoid most accidents. Three things matter most: a good hand guard, cut-resistant gloves, and a stable work surface.
Importance of the Hand Guard
The hand guard is your best friend here. It holds your food steady and keeps your fingers away from the blade. Most mandolines come with a guard that has little prongs or spikes to grip the food.
A lot of people ditch the guard because it feels weird or awkward. Don’t. Cooks call mandolines “finger guillotines” for a reason.
The guard becomes crucial when you’re down to the last bit of food. Once you’ve got less than an inch left, only the guard stands between you and a nasty cut. Stop before you get too close and finish with a knife—it’s just not worth the risk.
If your mandoline didn’t come with a guard, or you lost it, get a universal one before you use the slicer again.
Using Cut-Resistant Gloves
Cut-resistant gloves are a smart backup. They’re made from stuff like Kevlar or high-performance polyethylene, so they can take a slice without falling apart.
Wear the glove on the hand holding the food or the guard. Make sure it fits snugly—loose gloves can catch on the blade or make you clumsy. Go for Level 5 cut resistance if you can.
Even with gloves, always use the hand guard. Cut-resistant isn’t cut-proof, and a sharp blade can still do damage if you slip. The glove just helps reduce the severity if things go sideways.
Wash your gloves as the manufacturer suggests to keep them effective.
Safe Setup and Stable Surfaces
Before you start slicing, make sure your mandoline sits on a rock-solid surface. If the tool wobbles or shifts, you’re just asking for trouble. I always put mine on a clean, dry worktop and make sure I’ve got enough elbow room.
Most decent mandolines come with a rubber base that grips the counter. Double-check that this base actually touches the surface. If yours doesn’t have one, just slide a damp tea towel underneath—it works surprisingly well for stopping movement.
Set the mandoline perpendicular to your body, with the blade facing away. That setup gives you better control and helps the slicing motion feel natural. Clear away any clutter nearby so nothing gets in your way.
Put a bowl or container right at the output end. This way, slices land where you want them and your work area stays a bit more organised.
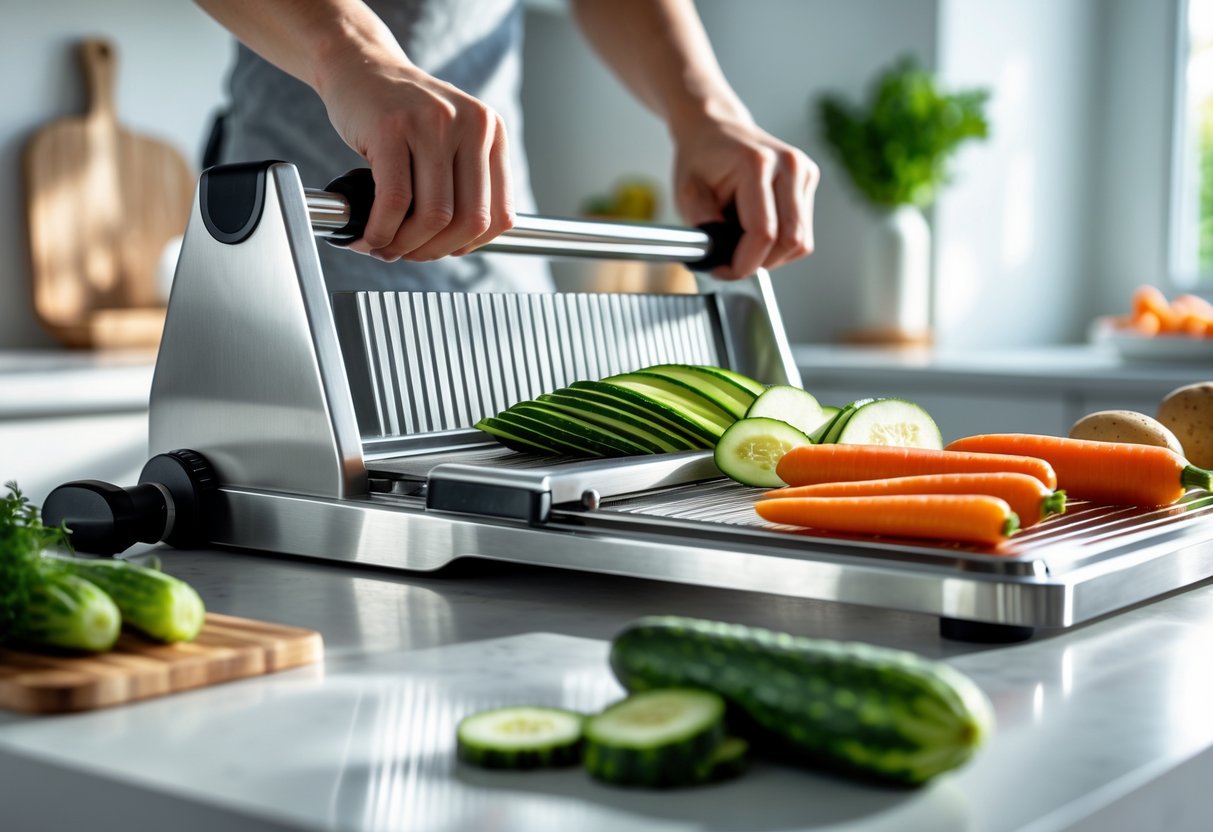
Step-by-Step Guide: How to Use a Mandoline Safely
Getting the most out of your mandoline starts with the right setup and some protective gear. Keep that hand guard between your fingers and the blade—always. Adjust blade settings before you get started, because changing thickness mid-slice is a recipe for disaster.
Preparation and Assembly
Set up your mandoline on a stable surface before you do anything else. If it slides, tuck a damp tea towel underneath. Drop a large bowl or tray at the output end to catch sliced vegetables.
Give the blade a quick inspection before each use. Make sure every part locks in tight. A loose blade or shaky frame isn’t worth the risk.
If you have cut-resistant gloves, put them on. The hand guard is still more important, but both together? Even better. Every mandoline should come with a hand guard, even the cheap ones. Don’t skip it.
Prep your veggies by cutting a flat base on round items like potatoes or beetroot. The flat side sits on the mandoline. That stops rolling and helps you get even cuts. Trim pieces so they fit securely in the hand guard. If they don’t fit, they’ll wobble and slip.
Adjusting Thickness and Blade Selection
Most mandolines let you pick thickness settings from 1mm up to about 8mm. If you’re new to this, start around 3-4mm. Lock the setting in before you put any food on the blade.
The straight blade covers most jobs. Swap in the julienne blade only for matchstick cuts—think salads or stir-fries. Always change blades with the mandoline sitting flat, never while holding it.
Test your chosen thickness with a single slice first. Adjust if you need to before you keep going. Saves food and hassle later.
Thickness Guide:
| Setting | Best For | Notes |
|---|---|---|
| 1-2mm | Crisps, carpaccio | Needs a steady hand |
| 3-4mm | Standard slices, gratins | Good for beginners |
| 5-8mm | Thick chips, roasting | Fast and safe |
Guided Slicing Techniques
Push your vegetable into the hand guard until it grips. You don’t want it moving around. Grab the guard handle with your dominant hand.
Use smooth, even strokes away from your body. Apply gentle pressure and let the blade do its thing. Forcing it just makes things harder.
Keep your speed steady. That’s how you get even slices and avoid awkward rhythm breaks that can cause slips. Keep your other hand away from the mandoline.
Stop slicing when the piece gets too small for the hand guard to hold. Usually that’s when there’s about 2-3cm left. Just chop those bits with a regular knife. Don’t try to finish off the last bit with the mandoline—it’s not worth the risk.
Watch what you’re slicing, not the bowl. Keep your eyes on the hand guard and food the whole time. A second’s distraction is all it takes for an accident.
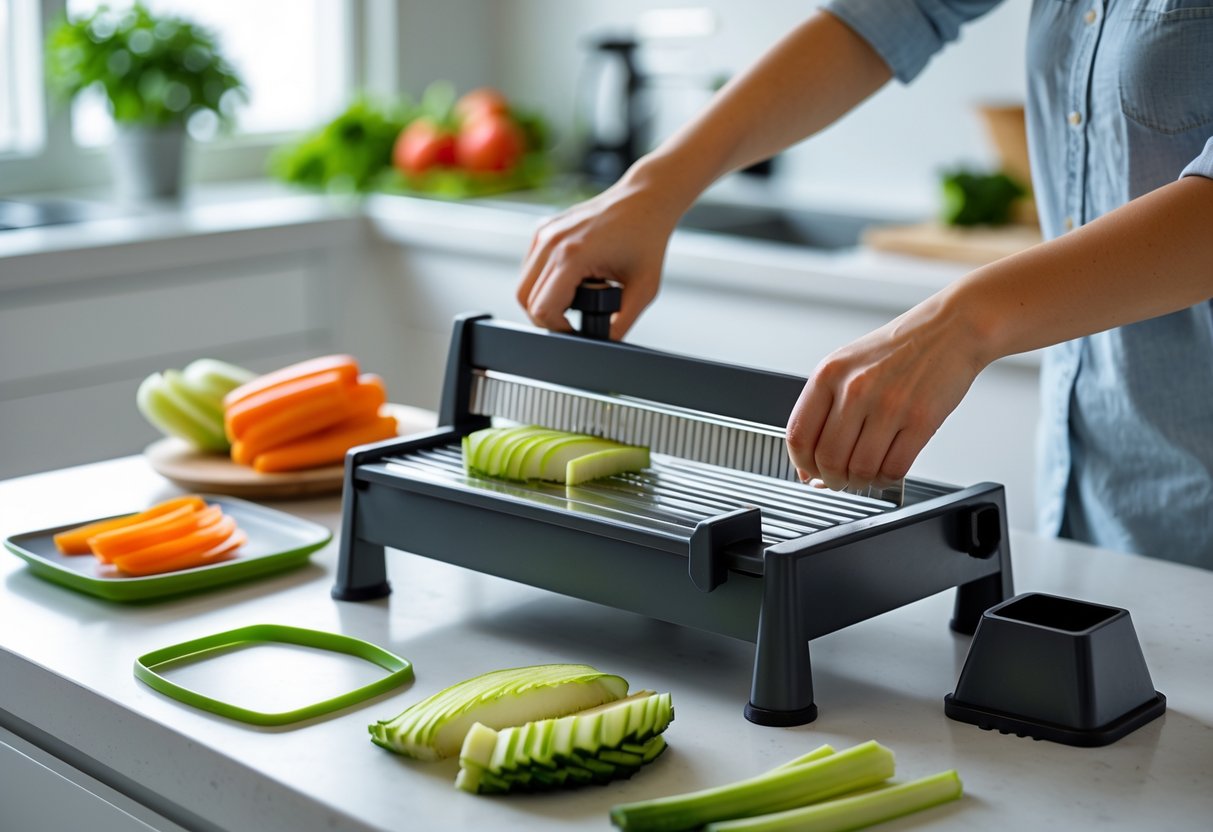
Setting Up Your Kitchen for Mandoline Use
Getting your workspace ready makes mandoline slicing safer and a lot faster. Start with a stable cutting board and make sure your mandoline sits securely.
Choosing the Right Cutting Board
A big cutting board is best for mandoline work. Aim for at least 30 by 40 centimetres so you can catch slices as they fall. Wood and bamboo boards grip the mandoline well because they’ve got a bit of texture.
Plastic boards with rubber corners also work. Some folks like adding a damp tea towel under any board for extra grip. Just make sure you’ve got enough space for the mandoline and a bowl to collect your food.
Set the cutting board right in front of you, perpendicular to the edge of the counter. This lets you slice forward and back comfortably, not sideways—sideways is awkward and can mess you up.
Ensuring Mandoline Stability
Most good mandolines come with rubber feet or a non-slip base. Check that these grips are clean and dry before you start. Grease or water makes them useless. All four corners should sit flat on the board.
Test stability by pressing down on the guard rails before adding food. If the mandoline moves, reposition it or add a damp cloth underneath.
Angle the blade away from your body. That keeps your hands away from the sharp edge. The cutting board should support the whole mandoline—nothing should hang off the edge.
Popular Uses for a Mandoline in Everyday Cooking
A mandoline really shines when you need thin, even slices that a knife just can’t deliver. It’s especially handy for potato-based dishes where you want everything to cook evenly.
Homemade Potato Chips and Crisps
Making homemade potato crisps is so much easier with a mandoline. You can slice potatoes paper-thin—1-2mm is the sweet spot. That way, every crisp cooks at the same rate and you don’t end up with some burnt and some soggy.
Most mandolines let you pick between 1mm and 3mm. For classic crisps, 1.5mm is usually perfect. Thicker settings (2-3mm) give you those kettle-style chips with more bite.
Wash and dry your potatoes first. Floury types like Maris Piper or King Edward work best. After slicing, rinse the potato rounds in cold water to get rid of extra starch. That helps them crisp up better when frying.
Perfect Scalloped Potatoes
Scalloped potatoes need slices that are all the same thickness to cook evenly. Set your mandoline to 3mm. That’s thin enough to soften up but thick enough to hold together under all that cream and cheese.
If you cut by hand, slices can end up anywhere from 2mm to 6mm. That leads to some bits turning mushy and others staying firm. The mandoline fixes that. Waxy potatoes like Charlotte or Désirée hold their shape best in scalloped dishes.
Layer the slices so they overlap a bit. It looks nice and helps the cream spread out evenly. With uniform slices, the dish bakes more predictably—usually about 60-75 minutes at 180°C.
Uniform Slices for French Fries
For French fries, the mandoline’s julienne blade is a game-changer. It cuts potatoes into perfect 6mm or 8mm sticks. Most V-blade mandolines have interchangeable blades, so you can go thin for frites or thick for chunkier chips.
The julienne blade gives you fries that are all the same size. That means they cook at the same rate and you get golden outsides with fluffy insides. Hand-cutting just can’t compete.
Soak the fries in cold water for about 30 minutes to remove starch. Dry them well before frying—no one likes oil splatter. Double-frying works best, and with even fries, timing is much easier.
Creative Applications: Beyond the Basics

A mandoline opens up all sorts of options for dishes that need uniform or super-thin cuts. It’s brilliant for restaurant-style coleslaw and fancier garnishes that would take forever by hand.
Coleslaw and Salads
With the julienne blade, you can turn cabbage into perfect thin strips for coleslaw in seconds. Every strand comes out the same width, so the dressing coats everything evenly. Thick, uneven pieces just don’t soak up dressing the same way.
For Brussels sprout salads, the mandoline shaves sprouts into delicate ribbons. That’s pretty much the only way raw sprouts taste good. Slicing by hand works, but it’s slow and never quite as thin.
Fennel, beetroot, and radishes also benefit from paper-thin slices. That makes them nice for salads, since thicker pieces can be too crunchy or overpowering.
Precision Garnishes and Decorative Cuts
If you want waffle-cut veggies, grab a crinkle blade attachment. Rotate the vegetable 90 degrees between slices to get that crosshatch look. These are great for homemade crisps or roasted garnishes.
Cucumber ribbons for platters come out perfectly thin if you run them lengthwise along the mandoline set to its thinnest. The same trick works for courgettes for carpaccio and apple slices for tarts. Consistent thickness means even cooking and a sharp-looking result.
Adjustable settings let you match slice thickness to the recipe. Go thicker for gratins, thinner for garnishes that curl up a bit when dressed.
Maintaining and Cleaning Your Mandoline Safely
Your mandoline slicer needs regular cleaning and the right storage to stay sharp and safe. Take care of the blade to avoid rust and dullness, and use proper cleaning techniques so you don’t cut yourself on those razor-sharp edges.
Blade Care and Sharpening
Mandoline blades are some of the sharpest tools in the kitchen, so treat them with care. Most are stainless steel or ceramic, and both can dull over time. Check the blades every few uses by gently feeling along the flat side (never the edge) for rough spots or nicks.
If the blade gets dull, slicing gets harder and veggies start to tear instead of cutting cleanly. Some mandolines let you swap out blades when they’re dull. Others need professional sharpening or a special sharpener made for mandoline blades. Don’t use a regular knife sharpener—it can ruin the blade’s edge.
For ceramic blades, you generally have to replace them when they’re dull. Stainless steel blades can be sharpened with a fine whetstone at a 15 to 20 degree angle, but you’ll need steady hands and a bit of practice. Always wear cut-resistant gloves when you’re handling or sharpening blades.
Safe Cleaning Practices
Don’t ever dunk a mandoline in soapy water with the blades hidden under the surface. That’s just asking for trouble if you reach in blindly.
Instead, take the mandoline apart following the manufacturer’s instructions. Separate the blade from the main body if you can.
Hold each part under running water. Grab a soft-bristle brush and scrub away any food bits stuck on the blade.
Always brush away from the cutting edge—basically, move the brush in the same direction you’d slice. A little washing-up liquid on the brush helps lift off stubborn potato or courgette pieces wedged in the blade teeth.
Most mandolines really shouldn’t go in the dishwasher. Harsh detergents and high heat can dull the blades and mess up the plastic.
If your slicer has a non-removable blade, be extra careful cleaning around those sharp edges. Dry every part right away with a tea towel to keep rust off the blade.
Storing Your Mandoline
Mandoline blades stay exposed, even when you’re not using them. That makes storage a bit risky.
A lot of models come with a blade guard that snaps over the sharp edge. Use it every single time before putting the mandoline away.
If you toss an unprotected blade into a drawer, you’re just waiting for a nasty cut next time you reach in.
Store the mandoline flat in a drawer or on a shelf where it won’t get knocked around. If you stand it upright, it could topple over and the blade might get damaged.
Some folks keep their mandoline in its original box. That’s actually smart—it protects both the tool and your hands.
Try to keep the food holder attached during storage so it doesn’t wander off. A mandoline without its safety guard is just an accident waiting to happen.
Is a Mandoline Actually Worth Buying?
A mandoline slicer gives you those super-thin, uniform slices that are nearly impossible to get with a regular knife. But you’ve got to handle it carefully, and it does take up some space in your kitchen.
So, is it worth it? That really depends on how often you want precise cuts—and whether you’re willing to stick to the safety rules.
Key Advantages and Trade-Offs
A mandoline shines when you need paper-thin slices for gratins, crisps, or salads. You can slice a cucumber or courgette into perfect rounds in seconds.
Try doing that with a knife—it’s just slower and usually less consistent. The mandoline also handles julienne cuts for stir-fries and slaws, making nice even matchsticks.
Safety is the big trade-off. The blade is razor sharp, and your fingers get pretty close during slicing.
Most injuries happen when people get overconfident or rush. The hand guard helps a lot, but it does make it hard to slice the last bit of each veggie, so you might end up with a bit more waste. more waste
Storage can be tricky too. Mandolines with lots of attachments and adjustable blades take up a fair amount of space.
Some fold flat, but you still need to protect that blade so you don’t cut yourself digging through a drawer.
Prices range a lot. Basic plastic models start around £15, while pro stainless steel ones can go over £100.
Honestly, most home cooks are happy with something in the £30–£50 range for a good mix of durability and features.
Who Will Benefit Most
Home cooks who often make dishes needing uniform veggie cuts get the most out of a mandoline.
If you’re into potato gratins, homemade crisps, or Asian stir-fries, you’ll probably use it enough to justify the space.
Batch cooks especially love mandolines. Prepping a week’s worth of salads or roasted veggies is way quicker—you can slice up a pile of courgettes, carrots, or peppers in minutes.
Even thickness means everything cooks evenly, whether you’re roasting, sautéing, or pickling.
If you care about presentation, you’ll love the pro look a mandoline gives. Think restaurant-style fennel carpaccio or perfectly cut veggie chips.
But if you only cook a few simple meals a week, you might not reach for the mandoline often. For basic chopping in soups or stews, a sharp chef’s knife is just easier.
Potential Alternatives
A sharp chef’s knife is still the most versatile tool in the kitchen. With some practice, you can get thin slices on most veggies, though paper-thin consistency takes real skill.
Knives don’t need special storage—just a block or magnetic strip—and used properly, they’re less likely to cause serious injury.
Food processors with slicing attachments handle big batches well. They’re great for prepping lots of veg for slaws or roasting, but they can’t do super-thin slices and need extra cleanup.
Plus, their slices aren’t always perfectly even.
Ceramic slicers are a decent middle ground. They’re small, cost £10–£20, and work for basic slicing jobs.
You don’t get the adjustability or precision of a mandoline, but if you only need uniform slices now and then, they’re worth considering.
Box graters with slicing sides can handle hard veggies like carrots or potatoes for simple tasks. They can’t match a mandoline’s precision or range of cuts, but they’ll do in a pinch.
Frequently Asked Questions
Here are some of the most common questions about mandoline slicers—mostly about safety, how to choose one, and what you can really do with it.
What essential features should one look for when choosing a mandoline?
The hand guard or food holder with metal teeth is hands-down the most important safety feature. It grips the food and lets you slice right down to the end without risking your fingers.
Look for a non-slip base or rubber feet too—nobody wants the mandoline sliding around on the counter.
Blade options matter if you want versatility. The best models come with both a straight blade for firm veggies like potatoes and carrots, and a V-shaped blade for softer things like tomatoes or mushrooms.
Extra julienne or coarse blades are handy if you want to branch out.
Adjustable thickness settings are a must. Good mandolines let you switch between paper-thin and thicker slices up to about 12mm.
Make sure the adjustment locks in place so the blade doesn’t shift while you’re slicing.
How can one ensure safety while operating a mandoline slicer?
Always use the hand guard, even if you think you’ve got it under control. The metal teeth grab the food and keep your fingers far from the blade.
Put a damp tea towel or non-slip mat under the mandoline before you start. That stops it from skidding around.
Set the mandoline at a slight angle over a cutting board, perpendicular to your body, so the slices fall away neatly.
Cut a flat edge on the fruit or veg first with a knife. That way, you get a stable base and the food won’t wobble on the first few passes.
Use firm, even pressure with each stroke—don’t force it or go too lightly.
What are the most common uses for a mandoline in the kitchen?
Potato gratins and scalloped potatoes are where the mandoline really shines. You get perfectly thin, even slices that cook and layer beautifully.
It’s also great for homemade crisps—just set it to the thinnest setting.
Raw veggie salads are a breeze. You can shave fennel, Brussels sprouts, cabbage for coleslaw, and cucumber rounds way faster and more evenly than with a knife.
It’s good for julienning carrots or other roots for garnishes or decorations.
The mandoline slices onions quickly for caramelising. Thin slices cook down faster and more evenly.
You can also use it for citrus rounds in drinks, apple slices for pies, and stone fruit for summer salads.
Which mandoline models are highly recommended by culinary experts?
OXO’s mandolines get a lot of praise for their reliable hand guards and stable design. Their straight-blade models work well for firm veggies and give you consistent slices.
For softer produce, V-shaped blade mandolines from respected brands do better. The angled blade slices through tomatoes, mushrooms, and ripe fruit without squashing them.
These usually cost a bit more, but they’re gentler on delicate foods.
Professional chefs often go for all-metal mandolines over plastic ones. The weight keeps them steady, and the blades hold their edge longer.
Still, home cooks get good results from high-quality plastic models with proper safety guards and a few blade options.
What methods are recommended to avoid injuries when utilising a mandoline?
Always use the food holder, especially as the piece of food gets smaller. Most injuries happen when someone thinks there’s enough left to hold, but it slips at the last second.
Make sure the hand guard’s teeth dig in deep enough to really grip the food.
Wearing cut-resistant gloves adds another layer of protection. Even rubber washing-up gloves help—if you do slip, they’ll take the brunt of it.
Gloves are especially helpful if you steady the mandoline with one hand while slicing with the other.
Take your time. Slow, steady strokes with even pressure work better than rushing.
Always keep your fingertips tucked under when handling food near the blade—just like with a chef’s knife.
Is investing in a professional-grade mandoline justifiable for home cooking?
If you’re a home cook who preps big batches of food often, a professional mandoline can actually be worth the money. People making gratins, coleslaw, pickles, or crisps every week usually save enough time to justify dropping £50 to £100 on a solid model.
You’ll probably get more years out of it, too. It just doesn’t wear out the way cheaper ones do.
On the other hand, if you only use a mandoline once in a while, you can stick with a basic model in the £20 to £40 range. These simpler versions still need a decent hand guard and adjustable blades for safety.
Most of the time, plastic construction and fewer blade choices keep the price down. For someone just making cucumber salad or slicing veggies once or twice a month, that’s usually plenty.
Blade quality, though, is really what separates the pro models from the rest. High-end mandolines hold their edge longer and cut through tough veggies without much effort.
You’ll notice less fatigue during prep, and your slices come out cleaner—no more bruised tomatoes or squished zucchini. Isn’t that what everyone wants?