Pizza Stone Guide: How to Use It, What Temperature & Get Perfect Crusts
A pizza stone can turn your regular home oven into something that feels much closer to a professional pizza oven. It holds intense, steady heat that crisps the base and cooks the toppings evenly.
A lot of home cooks end up with soggy or uneven crusts because their oven just can’t deliver that consistent bottom heat. Here’s the trick: preheat the stone in a cold oven for a full hour at 230°C to 260°C. That way, it absorbs and holds the high temperature you need for a crisp, golden crust.
Material really matters here. Cordierite stones are tough and resist cracking under high heat, which is great if you bake pizza often.
They heat up a bit slower than steel but give you a more forgiving, even bake. That works for all kinds of dough. Go for at least 2cm thick—it helps hold heat steady, especially if you’re making more than one pizza.
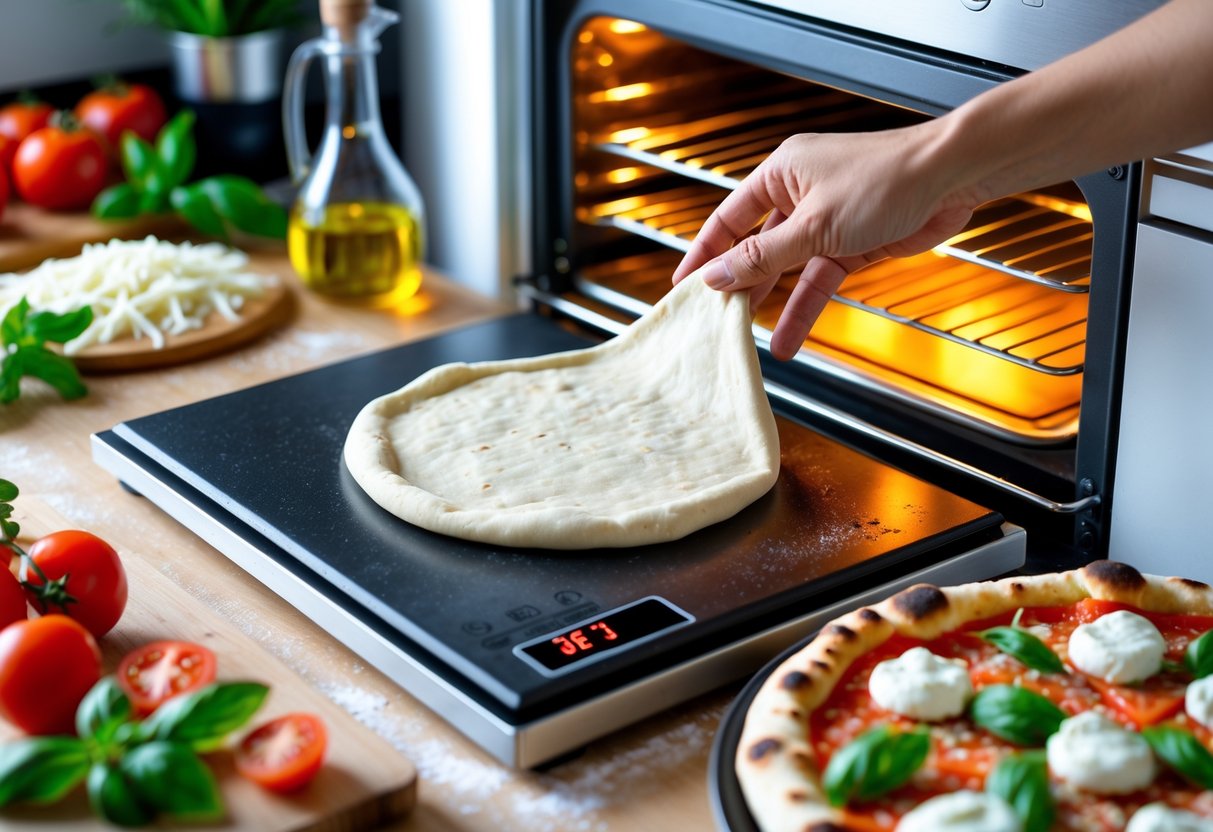
Getting the pizza onto the stone without sticking or losing its shape? That’s a skill. Use a peel dusted with flour or semolina, and try to slide the dough off in one smooth go.
That quick, confident motion can be the difference between a perfect pizza and a lopsided mess.
How Pizza Stones Work
A pizza stone really does transform a normal kitchen oven. It holds intense heat and actually pulls moisture from the dough while it bakes.
Heat Retention and Distribution
Pizza stones absorb heat slowly and then hold onto it through the entire bake. Most stones use cordierite or ceramic, which can handle temps up to 260°C without cracking.
These materials act like thermal batteries. They soak up energy from the oven and release it evenly across the dough.
When you slide a pizza onto a hot stone, the base hits a surface that stays hot, even as the cold dough tries to cool it down.
Metal trays lose heat fast when cold dough lands on them. That’s why you sometimes get pale, floppy crusts.
A thick stone—2cm or more—keeps its heat much better than thin ones.
Even heat means no hot spots. One side won’t burn while the other stays raw.
Every part of the crust gets the same amount of heat, so you get that lovely, even browning from edge to center.
Moisture Absorption for Crispy Crusts
The stone’s porous surface pulls moisture out of the dough as it cooks. That’s how you get a crispy, slightly charred base instead of something chewy and bread-like.
As water vapor escapes, the stone absorbs it instead of trapping it under the pizza. Metal trays just reflect that moisture back, which steams the base.
The stone’s ability to wick away moisture lets the bottom develop the right texture and color.
This gets even better as you use the stone more. Oils and flour build up over time, making it naturally non-stick and even better at crisping.
Simulating a Wood-Fired Oven
Traditional wood-fired ovens get insanely hot—often between 370°C and 480°C. Heat comes from all directions, especially from the floor.
A pizza stone tries to copy that floor effect by providing intense bottom heat, something home ovens just can’t do with air alone.
The stone creates a surface like the brick base of a pro oven. Even though most home ovens max out at 260°C, a preheated stone concentrates what heat there is right where the dough touches.
That focused heat transfer mimics the fast cooking of wood-fired pizza, where a pie bakes in just a couple of minutes.
You get a crust that’s crisp and a little charred underneath, chewy in the middle, and puffed at the edges. Without a stone, home ovens mostly cook from the top, leaving the base pale and kind of sad.
Choosing the Right Pizza Stone
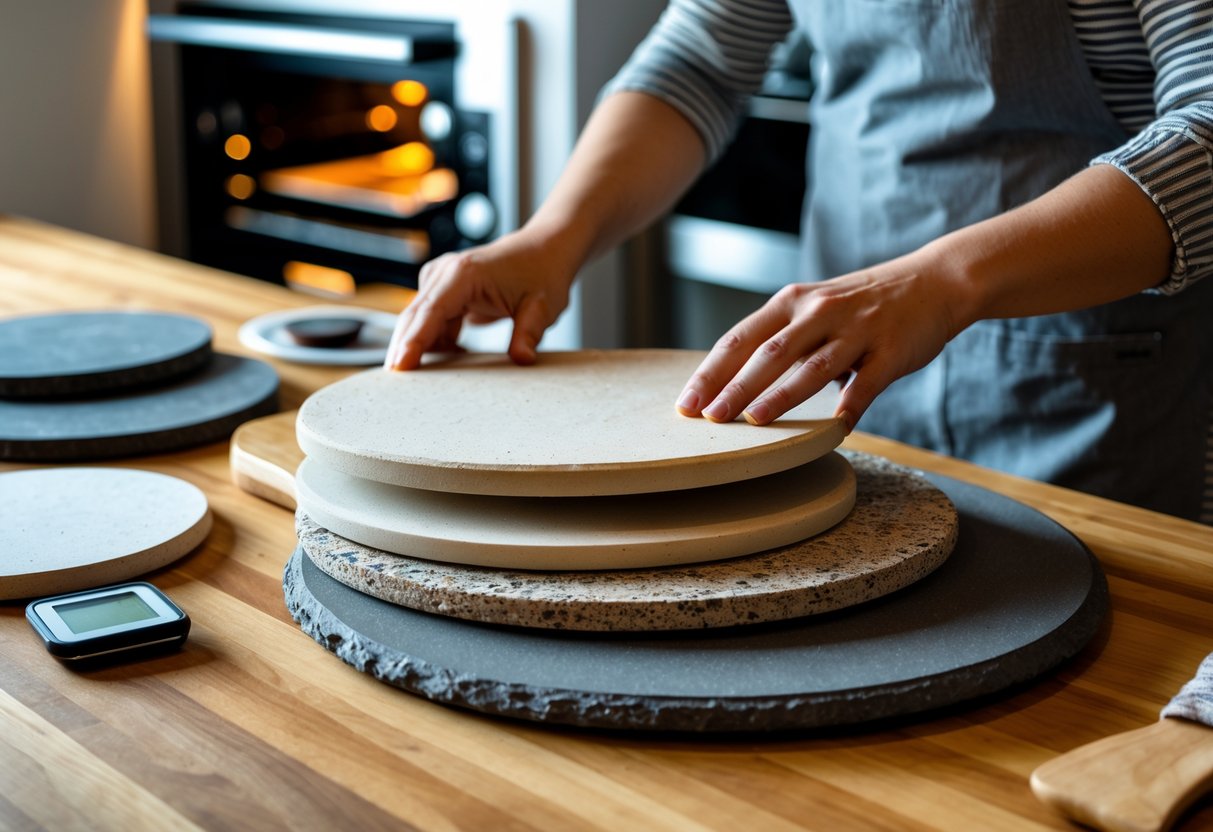
Picking the right pizza stone comes down to material, size, and how much heat it can take. Cordierite is super durable and handles thermal shock well.
Ceramic heats evenly and is good for softer crusts. Steel gets hot faster but acts differently than traditional baking stones.
Stone Materials: Cordierite vs Ceramic vs Steel
Cordierite is usually the top pick for home cooks. It can take extreme temperature swings without cracking.
You can put it in a cold oven, crank up the heat, and it’ll be fine. It keeps the temperature steady while you bake, which helps get an even crust.
Ceramic stones are cheaper. They’re great for gentle, even baking and work well with softer doughs. The downside? Ceramic cracks more easily with sudden temperature changes, so you need to be careful.
Clay-based pizza stones are similar to ceramic. They’re good at absorbing moisture and crisping the base, but they need more care and seasoning than cordierite.
Shapes, Sizes, and Thickness
Rectangular stones give you more usable space than round ones. You can fit them better in the oven and have more room to maneuver the pizza.
Round stones are fine for classic, circular pizzas, but you lose some flexibility.
Thickness is actually a big deal. Go for at least 1.5 to 2 centimeters thick—a thicker stone holds heat better and doesn’t cool off as much when cold dough lands on it.
Before you buy, measure your oven. The stone should fit with at least 2 to 3 centimeters of space around the edges for air to circulate.
Comparing Pizza Stone and Baking Steel
Baking steel heats up faster than stone and gets hotter overall. It conducts heat so well that you get a serious bottom char and crunch.
Steel cools down faster between pizzas, though, so if you’re making several in a row, you might notice a difference.
Pizza stones heat up more slowly but keep their temperature longer. They’re a bit more forgiving, especially if you’re still figuring things out.
The stone’s porous surface absorbs extra moisture, while steel just reflects heat back into the dough.
Steel is heavier and costs more, but it’ll pretty much last forever. Stones can crack, but if you take care of them, they’ll go the distance.
Preheating Your Pizza Stone Effectively
Preheating is what turns a pizza stone into a real heat source, almost like a pro pizza oven. The stone needs enough time to warm up and should be in the right spot in the oven.
Required Preheating Time and Technique
You’ll want to preheat your pizza stone for 45 to 60 minutes at 475°F to 500°F (245°C to 260°C). That long preheat lets the stone soak up enough heat to crisp the base properly.
Always put the stone in a cold oven before you turn it on. That way, it heats up slowly and doesn’t crack from thermal shock.
Use an oven thermometer for accuracy—most built-in oven gauges aren’t totally reliable. Home ovens cycle on and off, so the stone needs extra time even after the oven says it’s ready.
If your stone is thicker than 1.5 centimeters, add another 10 to 15 minutes. Thin stones heat up quicker but lose heat faster when cold dough hits.
Oven Placement and Rack Position
Stick the pizza stone on the middle rack for balanced heat. That keeps it the same distance from the top and bottom heating elements, so you don’t burn the base or leave the toppings raw.
If you want extra browning on top, try moving the stone to the lower third of the oven. That gives the toppings more time to cook while the base crisps up.
Don’t put the stone right on the oven floor. That spot gets too hot and can burn the stone or your pizza. Leave about 5 centimeters of space around the stone for air to flow.
Pizza Stone Baking Temperatures
The sweet spot for baking pizza on a stone at home is 475°F to 500°F (245°C to 260°C). That range gets you a crisp base and gooey, melted cheese.
You might need to tweak it a little for different pizza styles, but keeping an eye on the stone’s actual temperature is always smart.
Ideal Temperatures for Home Ovens
Most home ovens top out at 500°F to 550°F (260°C to 290°C). For a standard 12-inch pizza, set the oven to 475°F to 500°F (245°C to 260°C).
That’s hot enough to crisp the base without burning the toppings. Let the stone preheat for 45 to 60 minutes so it’s fully up to temp.
Make sure the stone, not just the air, gets hot. A properly heated stone gives you that classic crisp texture.
Put the stone on the middle or lower rack. Too close to the top and you’ll burn the cheese before the base is done.
Use an oven thermometer to check the real temperature. Oven displays can be off by 25°F (14°C) or more. Keep the thermometer on the same rack as the stone for the most accurate reading.
Recommended Temperatures for Different Pizza Styles
Thin crust pizza loves 500°F (260°C) for about 8 to 10 minutes. That high heat crisps the thin base fast without drying it out.
A 12-inch thin crust usually needs the full 10 minutes at this temp.
Thick crust and deep pan styles do better at 450°F to 475°F (230°C to 245°C) for 12 to 15 minutes. The lower heat gives the dough time to cook through without burning.
Neapolitan style pizza thrives at the highest home oven temperature, usually 500°F to 550°F (260°C to 290°C), for just 6 to 8 minutes. That quick, hot bake creates those signature charred spots and a soft center.
Monitoring Stone and Oven Temperature
Check the stone’s surface with an infrared thermometer before you launch the pizza. You want it within 25°F (14°C) of your oven setting. If it’s not there yet, give it another 15 minutes.
Opening the oven drops the temperature by 50°F to 75°F (10°C to 24°C). That’s normal, and the heat usually bounces back in a couple of minutes after you close the door.
Try to keep the oven thermometer visible through the window. That way, you can check the temp without opening the door. If you’re baking several pizzas, make sure the stone stays hot between each one.
Using a Pizza Peel: The Transfer Process
The pizza peel is your go-to tool for getting pizzas onto a hot stone without burning yourself or mangling the dough. If you prep the peel right and move with a bit of confidence, the pizza slides right off and lands where you want it.
Preparing the Pizza Peel
Before you even think about dough, dust the peel with flour. Semolina is great for this—its coarse grains act like little ball bearings, so the dough glides easily. If you don’t have semolina, all-purpose flour works just fine.
Spread the flour all over, especially near the edges where the dough might stick. A flour shaker helps you get a nice, even layer, but sprinkling by hand gets the job done too. Some folks use cornmeal, but honestly, it can burn at high heat and sometimes leaves the crust a bit gritty.
Once the peel is floured, don’t dawdle. The longer the dough sits, the more likely it is to stick as moisture soaks through the flour. After you add sauce and toppings, give the peel a gentle shake—the pizza should slide. If it doesn’t, lift the edges with a spatula and toss a bit more flour underneath.
Transferring Pizza Safely and Smoothly
Hold the loaded peel at the back edge of the hot pizza stone. Angle the peel slightly downward so the tip touches the stone. With a quick, backward jerk, slide the pizza off and onto the stone. The peel shouldn’t move much—the pizza does all the work here.
Pull the peel straight back as soon as the pizza lands. If you hesitate or push forward, the pizza might bunch up or fold. Metal peels usually beat wooden ones for this part since they’re thinner and slip under the dough more easily.
If the pizza sticks, don’t freak out and yank the peel. Quickly lift the stuck part with a spatula and add more flour. Practicing with plain dough rounds helps you get comfortable before you try it with a fully topped pizza.
Crafting the Perfect Pizza for Your Stone

Making pizza on a stone means paying attention to dough handling, picking the right toppings, and using solid baking techniques. Every step changes how the stone cooks the base and how crispy things get.
Dough Preparation and Shaping
Let the dough come to room temperature before you shape it. Cold dough fights you and never stretches evenly. Give it 30 to 60 minutes out of the fridge to relax.
Shape the dough by hand if you can. Rolling pins squash out all those nice air bubbles that make the crust interesting. Stretch from the center outward, turning as you go, aiming for about 3mm thickness for thin crust or 6mm for something heartier.
Dust your work surface with flour or semolina to stop sticking. Semolina even gives a little crunch to the bottom. Move the shaped dough onto a floured pizza peel before you add toppings.
If the edges look a bit uneven, that’s fine—it adds character. Just don’t let the center get too thin or it’ll go soggy under the sauce and cheese.
Choosing and Distributing Toppings
Go easy on the toppings when you use a pizza stone. Too much or too-wet toppings just make the center soggy. For a 30cm pizza, stick to around 80g of sauce and 100g of cheese.
Mozzarella cheese is best torn or shredded, not thickly sliced. If you use fresh mozzarella, drain and pat it dry first. Low-moisture mozzarella can go straight on.
If your veggies are watery—like mushrooms, peppers, or courgettes—sauté them first to get rid of moisture. Raw vegetables make the pizza take longer to bake and can mess with the crispiness.
Spread toppings evenly and leave about a 1cm border. This helps the crust puff up and brown. Add herbs like basil after baking so they stay bright and flavorful.
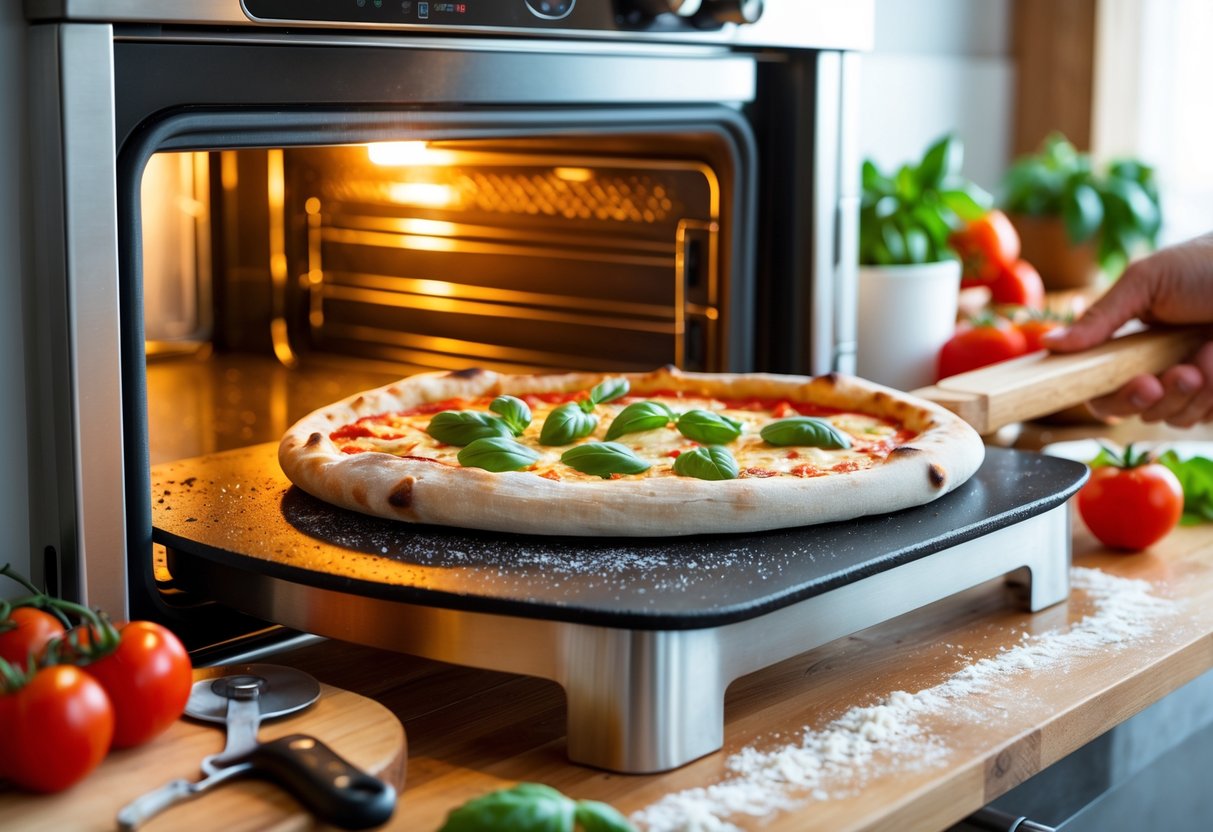
Optimising for Crispiness and Even Bake
Preheat the stone for at least 45 minutes. You want it hot all the way through, not just on top. An infrared thermometer can tell you when it’s ready, but honestly, just waiting long enough usually works.
Put the stone on the middle rack for even heat. If the top browns faster than the base, move the stone lower next time.
Slide the pizza onto the stone quickly. If you hesitate, the dough might stick. A quick shake before launching helps make sure it’ll release.
Rotate the pizza halfway through baking. Most ovens have hot spots, so this simple move gets you even browning all around.
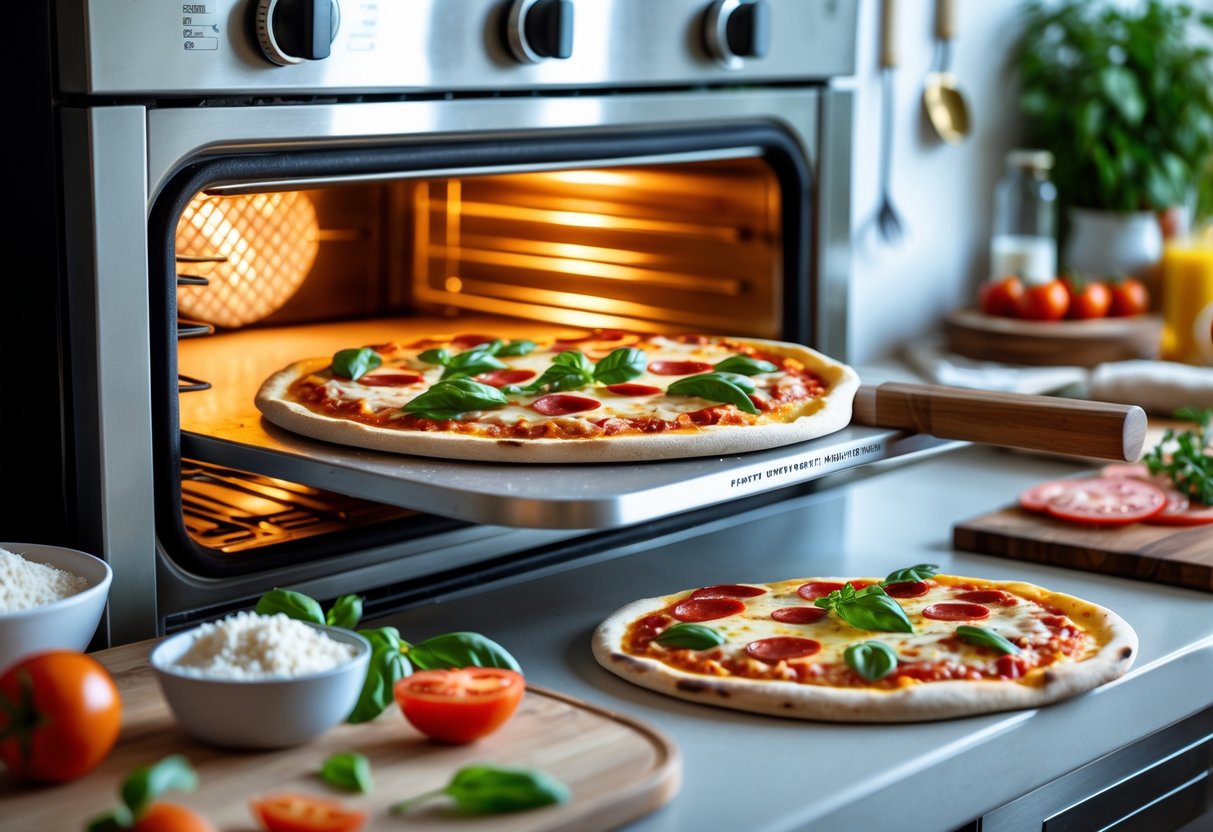
Baking Pizza on a Stone: The Step-by-Step Process
Once the pizza stone is hot, baking comes down to smooth movements and watching the dough. A 12-inch pizza usually takes 8 to 12 minutes at high heat, but it depends on your oven and dough thickness.
Placing and Turning the Pizza
Dust a metal peel well with semolina or flour before you build your pizza. Semolina works best—it keeps the dough moving. Give the peel a little shake to check.
Open the oven and set the peel at the back of the stone. Pull the peel back fast to slide the pizza on. Think of it like pulling a tablecloth out from under plates. If you pause, the dough bunches up or toppings slide off.
Most ovens have hot spots that burn one side while the other stays pale. After 4 or 5 minutes, use the peel to turn the pizza 180 degrees. Slide the peel under, lift, and turn. This helps the whole crust brown evenly.
Timing and Visual Cues for Doneness
A 12-inch pizza bakes in 8 to 12 minutes at 250°C to 260°C. Thin crusts go faster; thicker ones need the full time. The crust should turn golden brown with some dark spots—leoparding, as they call it.
Watch the cheese, not just the clock. It should bubble and get a few golden spots. The crust edges puff up and darken more than the center. Lift an edge with the peel and check the bottom—it should be brown and feel firm.
When the crust sounds hollow if you tap it, and the cheese has stopped bubbling, it’s done. Slide the peel under and move the pizza to a cutting board. It’ll keep cooking for another minute from the residual heat.
Optimising Results: Tips and Common Mistakes to Avoid
Getting great pizza from a stone means keeping the crust crisp and not cracking the stone. It’s all about managing moisture and temperature.
Preventing Soggy Crusts and Topping Issues
Soggy or undercooked crust is the most common headache. Usually, this happens when the stone isn’t hot enough or there’s too much moisture on the dough.
Preheat the stone for at least 30 minutes at your oven’s highest setting. A cold stone can’t absorb moisture fast enough, and you’ll end up with a limp base.
Don’t overload with wet toppings. Fresh mozzarella, for example, releases a lot of liquid as it bakes. Pat ingredients dry before they go on. Spread sauce thinly and avoid puddles in the middle.
If you’re worried about sticking, use parchment paper for the first few minutes, then slide it out so the crust can crisp directly on the stone. A light dusting of semolina or cornmeal on the peel also helps.
Avoiding Thermal Shock and Cracking
Thermal shock is what cracks most pizza stones. Rapid temperature changes make the stone expand or contract too quickly.
Always put the stone in a cold oven and heat it up with the oven. Never shove a cold stone into a hot oven—it’ll probably crack. After baking, let the stone cool inside the oven instead of moving it.
Don’t pour cold water on a hot stone when cleaning. Wait until it’s at room temperature first. Even a cold draft can sometimes cause cracking if the stone’s hot.
Skip oiling the stone. Oils soak in, smoke at high heat, and can weaken the stone over time.
Cleaning and Caring for Your Pizza Stone
Pizza stones need a little care if you want them to last. Avoid thermal shock, skip the soap, and always let the stone cool before you clean it.
After-Bake Cooling and Handling
Let the stone cool for at least two or three hours before cleaning. If you move a hot stone or splash cold water on it, you risk cracks. The quick temperature change makes parts of the stone expand or shrink at different rates.
Ceramic and cordierite stones crack easily if you aren’t careful with temperature changes. Don’t put a hot stone on a cold counter or run water over it. Just leave it in the oven or set it on a heat-safe surface away from drafts.
Proper Cleaning Methods
Once the stone is cool, scrape off any food bits with a plastic or rubber spatula. Wipe it with a barely damp cloth or sponge. Never use washing-up liquid—the stone will soak it up, and your next pizza might taste like soap.
For stubborn stains, mix a tablespoon of bicarbonate of soda with a little water to make a paste. Dab it on, wait ten minutes, then scrub gently with a nylon brush and wipe clean. The stone gets darker over time, and that’s totally normal.
Don’t soak the stone in water or toss it in the dishwasher. That weakens it and makes cracks more likely next time you use it.
Long-Term Storage and Maintenance
Let the stone air dry completely before you store it. Any trapped moisture can cause trouble when you heat it up again. Store it somewhere dry and safe from bumps.
Lots of people just leave their pizza stone in the oven all the time—it helps even out oven temps and keeps the stone safe. Over time, it’ll develop a dark patina. That’s a good sign and means the stone is well-used.
Never oil or season a regular pizza stone. That stops it from soaking up moisture and giving you a crisp crust. If you use a cast iron pizza stone, though, go ahead and rub it with a little oil after washing to keep rust away.
Alternative Uses and Advanced Techniques
A pizza stone isn’t just for pizza. You can throw it on a grill to get wood-fired vibes or use it to bake bread with that crackly, bakery-style crust.
Using Pizza Stones on Grills
Baking stones can turn a regular grill into something that feels a lot like a wood-fired oven. Make sure your stone can handle high temperatures before you try this.
Set the stone on the cold grill grates, then fire up the grill. Don’t rush—close the lid and give the stone at least 45 minutes to an hour to preheat.
This slow heating helps prevent cracks from thermal shock. The way the grill’s indirect heat works with the stone’s heat retention gives you that awesome char and crispness on pizza bases.
Keep an eye on the temperature. Most grills hit 250-300°C, which is perfect for Neapolitan-style pizza. The stone spreads heat across the base, and the closed lid acts like a pro oven, giving top heat too.
Try not to open the lid too often or you’ll lose that steady heat.
Experimenting with Breads and Other Bakes
Bread gets a fantastic crust on a preheated stone. Sourdough and ciabatta especially love that intense bottom heat, which gives them a great oven spring and a crispy crust.
The stone’s porous surface pulls moisture from the dough, so the outside crisps up nicely.
Preheat the stone for 45 minutes at 230-240°C before baking bread. Slide your shaped dough onto the hot stone using a floured peel or parchment paper.
If you want extra crust, toss a metal tray of water onto the oven’s bottom rack for steam.
Flatbreads—think naan, focaccia, pita—come out great too. The high heat makes pita puff up and form those classic pockets.
Biscuits, scones, and pastries also benefit from the even heat, but bake them at a lower temp, around 180-200°C.
Frequently Asked Questions
People have a lot of questions about pizza stones—mostly about temperature, placement, and what works best. Here are some of the most common ones from home cooks using ovens and grills.
What is the optimal temperature for cooking pizza on a stone in an oven?
For most home ovens, shoot for 450°F to 500°F (230°C to 260°C). That range gets you close to what a traditional pizza oven does, without pushing your home oven too far.
Some ovens go up to 550°F (290°C), which is awesome for thin-crust pizzas that need a blast of heat. The stone soaks up and holds onto this high temperature, so you get that crisp base everyone wants.
If you’re making a thicker pizza or piling on toppings, try sticking closer to 450°F. That way, you won’t burn the bottom while the center finishes up.
The stone keeps the cooking surface hot, even if you open the oven door for a second.
How should one utilise a pizza stone on an electric hob?
Honestly, electric hobs just don’t heat pizza stones evenly. The direct heat from a single burner creates hot spots, and that can crack most stones.
Also, putting a stone straight on the hob risks thermal shock, especially with cordierite or ceramic.
Ovens really do a better job here. If you want to cook pizza on the stovetop, try a cast iron pan—it can handle direct heat without breaking.
What are the best techniques for using a pizza stone in a conventional oven to achieve maximum results?
Put the stone on the lowest rack before you turn on the oven. This puts your pizza close to the heat source and gives you maximum bottom crispness.
Give it a full hour to preheat. If you rush it, the stone’s center stays cooler than the surface, which leads to uneven cooking and maybe even cracks.
Use a thin metal peel dusted with semolina or flour when moving your pizza. With a quick, confident slide, the dough won’t stick or fold over.
After you’re done baking, just leave the stone in the oven to cool down. Moving a hot stone can cause cracks or burns, and letting it cool naturally keeps it in good shape.
Is it necessary to preheat the pizza stone before baking pizza, and if so, for how long?
Absolutely—preheating is key. If you skip it, the dough sits on a cold stone and steams instead of crisping up.
Aim for at least one hour at your cooking temperature. That way, the whole stone—not just the top—gets evenly hot.
Always start with a cold oven and a room-temp stone. If you put a cold stone into a hot oven, you risk cracks from the sudden temperature change.
How can you prevent the pizza from sticking to the stone during the cooking process?
Dust your pizza peel generously with flour or semolina. These grains act like little ball bearings, so the pizza slides right off onto the stone.
Never oil or grease the stone. Oil burns at pizza temps, leaves stains, and just isn’t worth the mess.
Before you launch the pizza, give the peel a little shake. If the pizza moves, you’re good to go. If it sticks, lift the edge and toss a bit more flour underneath.
Once you’ve added toppings, work quickly. The longer the dough sits on the peel, the more likely it’ll stick—especially with saucy or wet toppings.
What are the steps to use a pizza stone on a grill effectively?
Start by placing the stone on the cold grill grates before you light anything. If you let the temperature rise gradually, you won’t risk cracking the stone, and it’ll soak up heat more evenly.
Shut the grill lid and let it preheat for about 45 minutes, or maybe up to an hour if you’re patient. This way, the heat gets trapped around the stone, and you end up with something that feels a lot like a wood-fired oven.
Double-check that your stone can handle high heat before you try grill cooking. Not every stone is built for the direct, intense heat a grill throws out.
When you cook the pizza, keep an eye on it—grills tend to run hotter than ovens, especially underneath. You might notice the pizza finishes several minutes faster than you’d expect. Plus, that smoky flavour from the grill adds a special touch you just can’t get indoors.